How to Get Accurate Roof Repair Estimates in Little Rock: Your Practical Guide to Costs & Quotes

An accurate roof repair estimate is an itemized breakdown of the parts, labor, and services needed to fix your roof—prepared with Little Rock’s weather and local building practices in mind. This guide walks you through how estimates are created, the local cost drivers that make prices vary, and how to read and compare quotes so you don’t get caught by surprise. Whether damage comes from storms, age, or leaks, understanding professional inspections, material choices, and solid documentation will help you get a reliable number. You’ll learn the main cost drivers, the inspection steps that produce an itemized quote, how insurance workflows usually work here, and realistic cost ranges for common Little Rock repairs. We also explain how contractor support can improve insurance outcomes and how to schedule a Free Roof Inspection and Quote. Throughout, we use local examples, clear material comparisons, and checklists you can act on so you can move from estimate to repair with confidence.

What Are the Key Factors Affecting Roof Repair Cost in Little Rock?
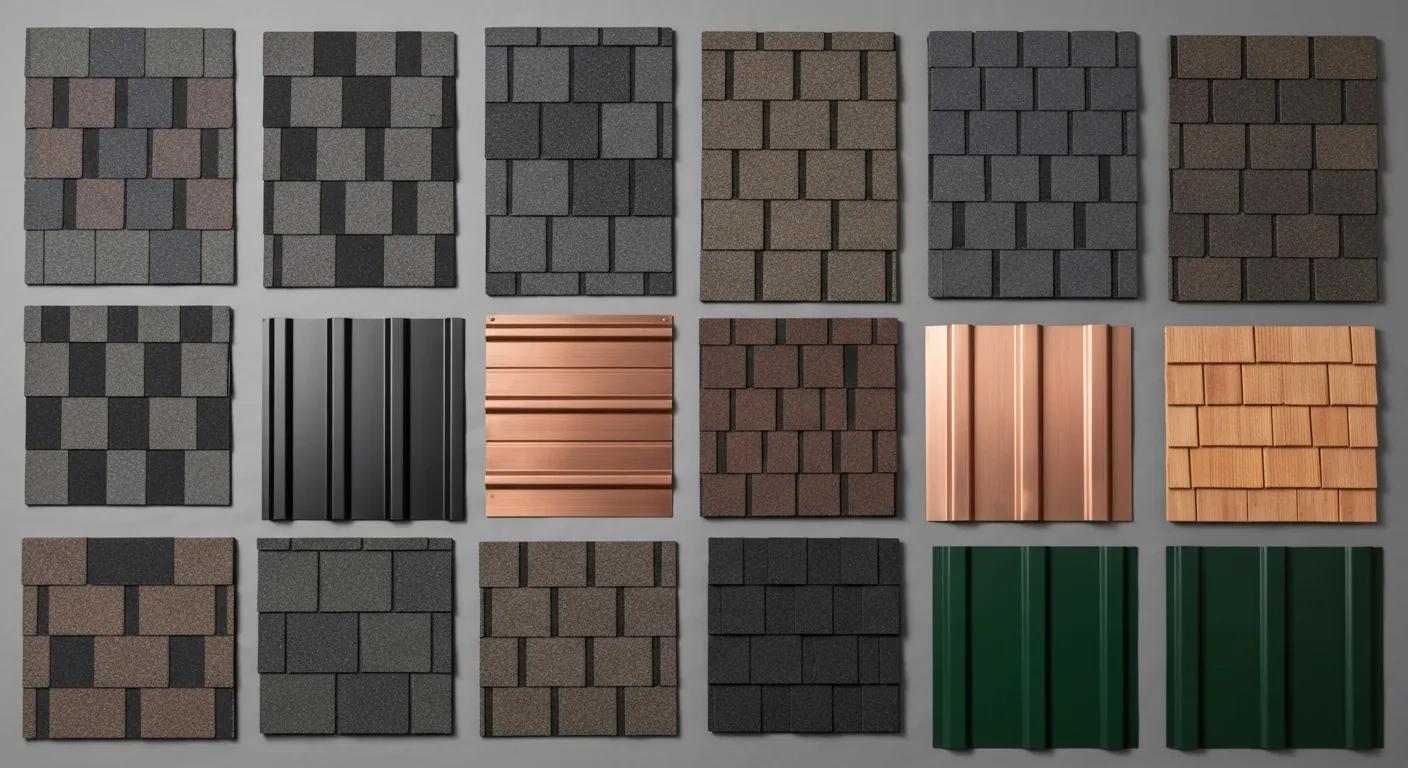
Roof repair costs in Little Rock come down to a few measurable factors: roofing material, roof size and pitch, the type and severity of damage, local labor and disposal fees, and any permits or code requirements. Each factor affects material quantities or labor complexity and shows up in the line items on an estimate. Knowing these drivers helps you understand why two contractors can give different numbers and which charges you can question. The rest of this section breaks down how materials affect price, how complexity changes scope, gives a quick material comparison, and offers practical steps to reduce surprises when you request quotes.

Materials influence both the up-front repair price and long-term value. Material cost, expected lifespan, and local availability factor into repair-versus-replace decisions and warranty expectations. The table below compares common roof systems in Little Rock—showing typical cost ranges per square foot, expected durability, and how each performs in local weather—so you can weigh short-term expense against lifecycle cost when reviewing an estimate.

MaterialTypical Cost per sq ft (repair/replacement)Typical Durability (years)
Asphalt shingles$4.00–$6.0015–25
Metal roofing (pan/standing seam)$8.00–$14.0040–70
TPO (single-ply)$4.50–$7.5020–30
EPDM (rubber)$4.50–$7.5020–30

This quick comparison shows asphalt shingles are often the lowest upfront cost but typically need more frequent maintenance, while metal roofing costs more initially and lasts much longer. When you compare estimates, balance your immediate budget with projected lifecycle costs—sometimes a higher up-front price reduces expenses and headaches later.

Damage severity and roof complexity are the other big cost drivers. A small shingle patch is very different from multi-area leak repair that requires decking replacement or structural work. Labor rates rise for steep slopes, complex flashing details, or commercial membrane systems that need specialized crews. Below is a checklist of the core items an estimate should explain so you can compare bids fairly.

  1. Material type and the exact quantity required for the job.
  2. Whether structural or decking repairs are included or excluded.
  3. Adjustments for roof pitch, penetrations, and access challenges.
  4. Permits, disposal fees, and local code compliance items.

In short, an accurate estimate ties each cost to a clear factor—material, labor, or permit—and lists the assumptions used. When you request quotes, ask contractors to itemize how each checklist item appears in their estimate so you can compare apples to apples.

How Do Roofing Materials Impact Your Repair Estimate?

Variety of roofing materials including asphalt shingles, metal panels, and wooden shakes, displayed in a grid format, relevant to roofing repair estimates and material selection.

The roofing material you choose determines unit prices, expected lifespan, and how much prep work the estimate must include. Asphalt shingles tend to be the lowest cost per square foot for repairs, but they can hide underlayment or decking problems that add to the final bill. Metal roofs and single-ply membranes like TPO and EPDM have higher material and labor costs up front but often lower long-term maintenance and better storm resistance. Local supply, installer skill, and warranty terms also affect price—specialty products can add lead time and labor premiums.

When you compare quotes, look for specifics: brand, profile, and warranty language rather than a vague “matching shingles” line. That clarity reduces surprises about material quality and performance. Material choice can also influence insurance outcomes—some carriers prefer certain materials for replacement coverage—so consider both short-term expense and lifecycle value when deciding if a higher estimate is justified.

For more detail on renovation methods and common solutions, see the report cited below, which reviews roof components, common problems, and renovation steps.

Roof Renovation Methods and Problem-Solving in Maintenance

This report explains roof components and renovation methods, identifies common problems, and outlines practical solutions. It covers the renovation process from initial layout through finishing work, describes likely issues encountered during roof work, and recommends steps to prevent future problems. (Maintenance & services work — roof renovation, 2021)

How Does Damage Severity and Roof Complexity Influence Pricing?

Damage ranges from minor surface wear to major structural compromise, and each level changes the repair scope and the risk of hidden costs. Minor work—like isolated shingle replacement or resealing flashing—requires limited parts and labor and will be priced lower. Moderate repairs can include multiple areas, partial decking replacement, or extensive flashing work and raise both materials and labor line items. Major repairs such as full decking replacement, structural framing work, or system replacement require coordination with other trades and may need permits.

Complex roof shapes—steep pitches, hips and valleys, or many penetrations (skylights, chimneys)—add time and specialized labor that contractors should itemize. Limited access, tight staging areas, or close neighbors can increase mobilization fees. Because hidden damage can push costs up after work begins, strong estimates include contingency language, explicit constraints, and a clear change-order process. Require written assumptions in every estimate so you know how additional costs will be handled if hidden issues appear.

How Does the Roof Inspection Process Work for Accurate Estimates?

Professional inspector examining attic for damage during roof inspection, using flashlight to identify potential issues and ensure accurate repair estimates.

A professional inspection that produces an accurate estimate follows three clear steps: initial intake and information gathering, an on-site visual and technical inspection, and a written, itemized report with photos and recommended repairs. The inspection converts what’s visible (and what can be confirmed in the attic) into diagnostic findings and then into measurable line items—quantities, unit prices, and timelines—in the estimate. That documentation reduces ambiguity, helps with insurance claims, and makes it easier to compare bids.

Below is a simple mapping of inspection activities to the checks performed and the deliverables you should expect. This shows how each inspection step connects to items on the estimate and improves transparency across bids.

Inspection StepWhat Is CheckedTypical Deliverable
Initial intakeOwner description, photos, basic roof detailsInspection window and request for extra photos if needed
Roof surface surveyShingles/membrane, seams, flashing, fastenersPhotos of affected areas and annotated notes
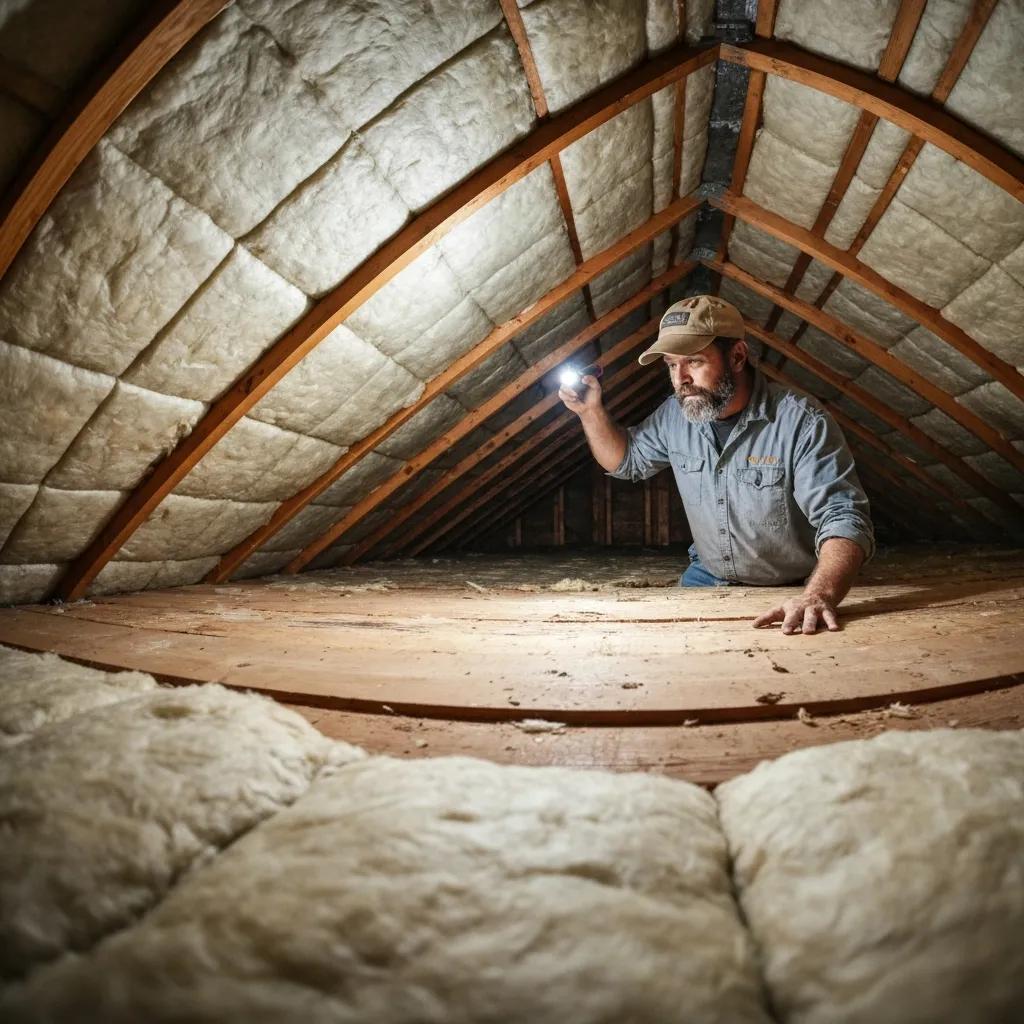
Attic and decking checkVentilation, insulation, decking rot or water stainsDiagnostic notes showing hidden damage or safe assumptions
Measurement & quantity takeoffRoof area, pitch, penetrations, waste factorSquare footage and material quantities for the estimate

A thorough inspection looks beyond visible damage by checking the attic and structure, allowing inspectors to include sensible contingencies or flag items that need more assessment. Clear deliverables—an inspection report, annotated photos, and an itemized draft quote—make the estimate verifiable and help when negotiating or filing insurance claims.

The short checklist below summarizes what homeowners should expect during an inspection and how those findings become a clear quote.

  1. Scheduler collects basic details and any homeowner photos.
  2. Inspector completes a roof surface walk and attic assessment.
  3. Inspector documents findings with photos, measurements, and a recommended scope.
  4. Contractor prepares an itemized estimate tied to each documented finding.

Together, these steps produce an estimate that links each charge to a documented inspection item, so you can compare costs and scope across contractors and provide robust documentation to an insurer if needed.

What Happens During a Free Roof Inspection in Little Rock?

A Free Roof Inspection in Little Rock starts with a quick intake and moves to a focused on-site check of the roof surface, perimeter flashings, attic, and drainage. Inspectors look at shingle or membrane condition, flashing integrity, gutter and downspout performance, and attic signs of moisture or rot. The time on site depends on roof size and complexity but typically includes a roof walk, attic check, and exterior perimeter review to capture direct and indirect damage indicators.

Inspectors also note local weather signs—storm debris or hail marks—to align recommendations with Little Rock’s climate. The inspector documents findings, estimates material quantities, and flags items needing specialist evaluation, producing a report that supports a precise, itemized quote. Homeowners speed up the process by providing attic access and any roof history or photos before the visit.

How Is a Detailed Roof Repair Quote Prepared and Explained?

A detailed quote converts inspection findings into an itemized list separating materials, labor, permit/disposal fees, and contingencies or exclusions so you can compare contractors directly. Each line should show a unit measure (square foot, linear foot, each), quantity, unit price, and a brief justification linked to a photo or inspection note. Warranties, timeline, payment milestones, and the change-order process should be clearly stated so you understand both scope and how additional work would be priced.

When reviewing a quote, ask the contractor to explain vague entries and show the photo or note that produced each line item—this turns estimated charges into verifiable claims. Good estimates also list exclusions so you can see potential future costs. Finally, confirm warranty coverage and who provides it (manufacturer or contractor) so you can weigh long-term value against short-term price.

How Can You Navigate Roof Repair Insurance Claims in Little Rock?

Filing a roof repair insurance claim in Little Rock starts with fast, dated photo documentation, an itemized professional estimate, and clear communication with your insurer and adjuster. The core steps are: document the damage, get a professional inspection and itemized estimate, file the claim, and coordinate any adjuster visits with your contractor’s documentation on hand. Contractor participation—providing a documented inspection and meeting the adjuster—can clarify technical points and help ensure the insurer’s scope matches the documented needs.

Use this checklist when preparing a claim and note how contractor support fits into each step.

  1. Photograph all visible damage with dates and notes.
  2. Schedule a professional inspection to get an itemized estimate and report.
  3. File the claim and provide the insurer with the inspection report and photos.
  4. Coordinate the adjuster visit and, if helpful, have your contractor attend to review findings.

Following this workflow reduces common problems—mismatched scopes or undocumented hidden damage—and improves the chance of a timely, favorable resolution by aligning evidence and professional assessment with insurer expectations.

How Does NM Make Ready Assist with Insurance Adjusters and Documentation?

NM Make Ready & Maintenance, LLC helps by delivering a professional inspection report, photographic evidence, and an itemized repair estimate you can share with insurers and adjusters. We can package documentation to match adjuster expectations and, when appropriate, join homeowners during adjuster walkthroughs to explain technical findings and proposed repairs. Aligning our estimate with inspection evidence reduces confusion and helps ensure the insurer’s scope of work reflects the documented needs.

A typical assistance workflow includes delivering a documented inspection, preparing an itemized estimate tied to photos, advising homeowners on what to present to the insurer, and meeting adjusters on-site to walk through findings—steps that save you time and often lead to clearer claim outcomes. This contractor-assisted documentation translates inspection findings into insurer-friendly evidence and helps minimize disputes over scope.

What Are Tips to Maximize Your Roof Repair Insurance Benefits?

To improve the odds that insurance covers needed repairs and to limit your out-of-pocket costs: document damage quickly, get a professional itemized estimate, keep receipts for temporary mitigation, and know your policy’s deductible and exclusions. Timely photos preserve evidence before weather or temporary fixes change the scene. An itemized contractor estimate provides line-item justification insurers expect. Temporary tarps and emergency measures should be documented with receipts—insurers often reimburse reasonable mitigation costs that prevent further damage.

Other useful steps: keep a clear file of all communications, ask the contractor for a written scope tied to photos, and request written explanations for any claim denials so you know next steps. Multiple professional estimates can help in disputes—just ensure each one references the same documented inspection so comparisons are fair. These practices increase the chance of a full, timely claim resolution and reduce financial risk for the homeowner.

What Are the Most Common Roof Problems in Little Rock and Their Repair Costs?

In Little Rock, common roof problems include leaks, storm-related shingle loss, flashing failures, and ponding on low-slope roofs. Each issue has typical repair cost ranges based on material, access, and hidden damage. Knowing frequent problems and expected price bands helps set realistic budgets and interpret contractor estimates. The table below lists common problems with representative repair ranges for Little Rock so you can benchmark quotes.

Different problems need different diagnostic and repair approaches. Use the table below to compare contractor estimates against typical ranges for each issue.

ProblemTypical Repair Cost RangeNotes
Isolated leak detection & repair$200–$1,200Depends on source complexity and attic damage
Shingle replacement (per square)$350–$1,200 per squareFull squares vs spot replacement affects price
Flashing repair or replacement$150–$900Chimney or valley work may be pricier
Storm damage repairs$300–$3,500+Varies with hail/wind extent and insurance involvement

These ranges show that simple leak fixes can be relatively affordable when limited to surface work, while storm damage and full-square replacements can escalate quickly. When reviewing an estimate, identify which problem category applies and confirm the contractor’s scope matches the typical work for that category.

Use this short checklist to judge whether an estimate is reasonable and complete.

  1. Does the estimate name the problem category and list the corrective actions?
  2. Are diagnostic photos and attic findings linked to each repair line?
  3. Is there a contingency allowance for hidden damage, and how will it be handled?

This checklist helps confirm whether the repair cost matches the documented problem and whether the contractor has planned for hidden issues that can change the final price.

How Much Does Leak Detection and Repair Typically Cost?

Leak detection and repair costs vary because locating the source can require attic checks, surface scans, and sometimes water testing. Typical Little Rock ranges start at a few hundred dollars for obvious, localized leaks and rise if decking or insulation must be replaced. A standard leak repair estimate separates detection, localized roof repairs, and any attic remediation or material replacement required by water damage. Multiple leak sources, difficult access, or rotten decking push prices higher.

Because hidden damage often increases the final cost, insist estimates itemize detection effort, repair materials, and attic work. Professional detection lowers the chance of repeat leaks and helps ensure the estimate covers both symptoms and the root cause for better long-term results.

What Are the Costs for Storm Damage and Shingle Replacement?

Storm repairs range from targeted shingle replacement to full-square or full-roof replacements depending on damage. Per-square pricing is a useful comparison tool. Partial shingle replacement after wind loss reflects unit shingle cost and labor to match roof lines; full-square replacement includes material, waste factor, and tear-off labor if needed. Insurance involvement often affects out-of-pocket cost—documented storm events and an itemized estimate with photos make claims smoother and can reduce homeowner expense.

When deciding between patching and full replacement, consider age and pattern loss—patching can be a short-term fix that won’t match aged shingles. Make sure the estimate explains why patching is acceptable or why full replacement is recommended, and ask for a cost comparison so you can weigh immediate savings against long-term performance.

Why Choose NM Make Ready & Maintenance for Your Roof Repair Estimate?

NM Make Ready & Maintenance, LLC is a locally owned Little Rock roofing company serving both homes and businesses. We offer a Free Roof Inspection and Quote and work with common systems—shingles, metal, TPO, and EPDM—so our inspections and estimates reflect local weather and storm patterns. We also help customers with insurance claims by aligning documentation and estimates with adjuster expectations, which can make the claim process faster and less stressful.

When comparing contractors, look for transparent, itemized quotes tied to documented inspections. We recommend reviewing a contractor’s project gallery and service pages for similar work. Ask for the detailed inspection report and itemized estimate so you can compare scopes. Choosing a local contractor that offers a Free Roof Inspection and Quote and can assist with insurance documentation shortens timelines and improves predictability.

What Local Expertise and Experience Does NM Make Ready Offer?

NM Make Ready works across residential and commercial roof systems common in Little Rock—asphalt shingles, metal, TPO, and EPDM. Our local experience helps us anticipate region-specific issues like storm debris, ventilation needs, and frequent flashing failure points. That familiarity leads to more accurate material choices, realistic scheduling, and smoother permitting when needed.

When comparing contractors, prioritize firms that show system-specific experience and a documented inspection process—those traits reduce the chance of unexpected scope changes once work begins. NM Make Ready’s capabilities position us as a practical option for homeowners who want local, experienced support.

How Do Customer Testimonials and Free Quotes Build Confidence?

Clear, itemized quotes paired with project photos and customer feedback reduce uncertainty by showing a contractor’s process and results. Testimonials and galleries let you see before-and-after examples and confirm the contractor has handled similar roofs. Free, documented quotes with inspection photos create a verifiable record you can use to compare offers or support insurance claims.

Ask contractors for recent examples of similar repairs and request references or a gallery of completed work to validate workmanship. When a contractor combines a Free Roof Inspection and Quote with clear documentation and real project evidence, you can base your decision on outcomes and proven processes—not just price.

How Can You Get Started with a Free Roof Inspection and Accurate Quote Today?

To get started, gather basic property details and any photos, request a documented inspection, and ask for an itemized quote that ties each line to inspection photos and findings. Scheduling is usually done online or through a contractor’s contact page or Google Business Profile—provide the property address, a short damage description, and photos to speed things up. After scheduling, expect an on-site inspection, a short diagnostic period while we prepare the report, and delivery of an itemized estimate with photos and recommended next steps.

The steps below make scheduling and follow-up straightforward so you can move from quote to repair or claim with minimal delay.

  1. Prepare basic details: address, damage description, and photos if available.
  2. Request the Free Roof Inspection and Quote via the contractor's contact page or Google Business Profile and suggest preferred inspection windows.
  3. Attend the inspection or provide access, and request the inspection report and itemized quote within an agreed timeframe.
  4. Review the estimate, ask questions about any line items, and confirm next steps—repair authorization or insurance coordination.

Having a clear timeline reduces stress: after you approve work, contractors typically order materials, secure any permits, and schedule the job while coordinating with insurers when needed. Keep the inspection report and itemized estimate handy to make coordination simple and efficient.

How to Schedule Your Free Roof Inspection in Little Rock?

To schedule a Free Roof Inspection and Quote, collect the property address, a brief description of the issue, and any photos, then request the inspection via the contractor’s contact page or Google Business Profile. Sending photos and a concise summary ahead of the visit helps the inspector prepare and can shorten on-site time. Most inspections are scheduled within days to a couple of weeks, with priority given to storm-impacted properties.

Ask what documentation you’ll receive and how long the itemized estimate will take—setting expectations up front speeds any insurance filing. Clear scheduling notes about access, attic availability, and nearby hazards help ensure a smooth inspection and a faster, more accurate estimate.

What Should You Expect After Receiving Your Roof Repair Estimate?

After you get an itemized estimate, review the line items, confirm materials and warranty terms, and clarify any exclusions or contingencies before you approve work. Common follow-up questions cover material specs, start and completion dates, payment schedule, and how hidden damage is handled. If you’re filing an insurance claim, submit the inspection report and itemized estimate to your insurer right away and coordinate adjuster visits so findings align.

Once you approve the estimate, the contractor will typically confirm the schedule, order materials, and begin permitting if required. Expect a written change-order process for any additional work uncovered after tear-off. Keeping the inspection report and estimate as a reference helps ensure the work matches the agreed scope and that warranty coverage is clear.

Frequently Asked Questions

What should I do if I find hidden damage during roof repairs?

If hidden damage is found, talk with your contractor immediately. Reputable contractors use a change-order process to document and price newly discovered issues. Make sure any additional costs are recorded, justified with photos or notes, and approved in writing before the work proceeds. Clear documentation keeps everyone on the same page and protects you from unexpected charges.

How can I ensure I receive a fair roof repair estimate?

Get multiple quotes based on the same scope of work and ask each contractor to itemize materials, labor, and fees. Compare those line items directly. Check reviews and testimonials to assess reliability. A thorough inspection report that accompanies the estimate gives clarity on roof condition and supports a fair comparison.

What are the benefits of a professional roof inspection before repairs?

A professional inspection uncovers visible and hidden issues an untrained eye may miss. That leads to estimates that include all necessary repairs and lowers the chance of surprise costs. A detailed inspection report also supports insurance claims by documenting damage and required repairs, which speeds the claims process.

How do I choose the right roofing material for my repair?

Choose roofing material by weighing durability, cost, and compatibility with your existing roof. Consider Little Rock’s climate—some materials resist storms and heat better than others. Metal roofing offers longevity and storm resistance; asphalt shingles are more affordable upfront. Talk with your contractor about options, warranties, and long-term value.

What should I expect during the roof repair process?

Expect preparation, the repair work, and final inspections. Contractors typically protect the property, remove damaged materials, and complete repairs or replacements. Maintain communication for progress updates and any unexpected findings. A final inspection ensures work meets quality standards and that your roof is ready for the elements.

How can I prepare for a roof inspection?

Gather roof history, past repair records, and warranty info. Make sure the attic and roof access are clear. If you have photos of visible damage, share them beforehand. Good preparation helps the inspector do a thorough job and leads to a more accurate estimate.

What are the common signs that my roof needs repair?

Look for leaks or ceiling stains, missing or broken shingles, sagging areas, and excessive granules in gutters. Mold or mildew in the attic or on the roof surface can also signal problems. Regular inspections catch these issues early and help avoid more costly repairs.

Conclusion

Getting accurate roof repair estimates in Little Rock helps you make smart, confident decisions about your roof. By knowing the main cost drivers and relying on a professional inspection, you can avoid surprises and ensure quality work. Schedule your Free Roof Inspection and Quote today to get a detailed, itemized estimate tailored to your property. Rely on local expertise to protect your investment for years to come.